How to Implement ATMEGA128-16AU for Real-Time Data Collection

The MCU industrial automation equipment control and data acquisition ATMEGA128-16AU microcontroller is excellent for collecting data quickly. It performs effectively for controlling machines in factories. You can utilize the ATMEGA128-16AU to gather crucial information from various locations. It connects seamlessly with systems that automate tasks. This microcontroller is beneficial for controlling equipment and collecting data. Its speed and versatility make it a top choice. It can handle multiple tasks simultaneously, saving time and ensuring accuracy in busy factory environments.
Key Takeaways
The ATMEGA128-16AU microcontroller works well for collecting data fast.
It is great for factories because it has many I/O pins.
Setting up the power and pins correctly is very important.
This helps it work well in tough factory environments.
Tools like Atmel Studio or Arduino IDE make coding easier.
These tools also help beginners fix problems quickly.
Adding feedback loops and real-time logging improves data accuracy.
This helps make better choices in automation systems.
Checking wires and keeping it safe from damage is important.
This keeps the microcontroller working well for a long time.
Overview of the ATMEGA128-16AU in Industrial Automation
Key Features and Specifications
The ATMEGA128-16AU microcontroller has many features for automation. Its 128KB flash memory can store large programs easily. With a 16MHz clock speed, it processes data quickly. This is important for real-time data collection. It works with UART, SPI, and I2C protocols. These let it connect to different sensors and devices.
Its 8-channel ADC collects accurate data from analog sensors. The 53 programmable I/O pins help control machines and tools. It also has power-saving modes to use less energy in systems.
Tip: Set up the ATMEGA128-16AU pins properly for better performance in factories.
Role in mcu industrial automation equipment control and data acquisition
The ATMEGA128-16AU is key in controlling and collecting data in automation. It acts like the brain of the system, managing sensors and machines. It can track temperature, pressure, and other data in real-time.
Its fast processing helps create feedback loops for efficient machine work. It connects easily to other systems using different interfaces. You can also save data for analysis to improve operations.
Using the ATMEGA128-16AU, you can make automation projects more reliable. It works for both simple and complex tasks, making it very flexible.
Setting Up the ATMEGA128-16AU for Data Collection
Tools and Parts You Need
To use the ATMEGA128-16AU for collecting data, you need certain tools and parts. These items help the microcontroller work well with sensors and devices. Here's what you need:
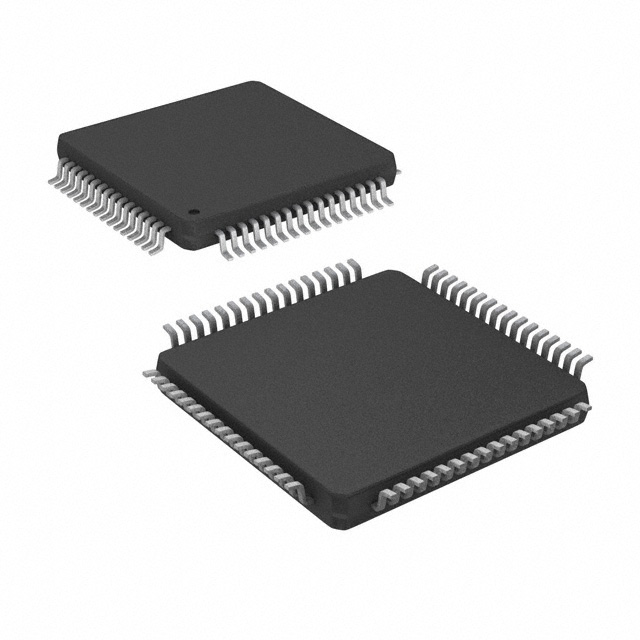
ATMEGA128-16AU Microcontroller: It processes and manages all the data.
Power Supply: Provides 4.5V to 5.5V for stable operation.
Sensors: Collects data like temperature or pressure readings.
Breadboard and Wires: Connects and tests your components.
Oscilloscope or Multimeter: Checks and fixes problems in your circuit.
Programmer/Debugger: Uploads code to the microcontroller, like AVRISP mkII.
Computer with IDE: Runs software like Atmel Studio or Arduino IDE to write code.
The ATMEGA128-16AU has features that make it great for collecting data. Here's a summary:
Feature | Specification |
|---|---|
RAM Size | 4 kB |
Clock Speed | 16 MHz |
ADC Resolution | 10 bits |
I/O Pins | 53 pins |
Voltage Range | 4.5V to 5.5V |
ADC Channels | 8 channels |
Flash Memory | 128 kB |
Tip: Check your power supply voltage to avoid damaging the microcontroller.
Setting Up Pins and Configuration
After gathering the tools, set up the ATMEGA128-16AU and its pins. This helps it talk to sensors and other devices properly.
Power Setup: Connect VCC and GND pins to the power supply. Keep voltage between 4.5V and 5.5V.
Clock Setup: Use a 16 MHz crystal oscillator for timing. Attach it to XTAL1 and XTAL2 pins with capacitors.
ADC Channels: Link analog sensors to ADC pins. The microcontroller has eight 10-bit ADC channels.
Digital Pins: Use I/O pins for digital sensors or actuators. There are 53 programmable pins available.
Communication Ports: Set up UART, SPI, or I2C for data transfer. For example, use UART for computer communication.
Programming Pins: Connect the programmer to ISP pins to upload and edit code.
Note: Check the datasheet for detailed pin diagrams and setup instructions.
Follow these steps to prepare the ATMEGA128-16AU for collecting data. A good setup ensures accurate and reliable performance in automation projects.
Programming the ATMEGA128-16AU for Real-Time Applications
Picking the Best IDE and Compiler
To program the ATMEGA128-16AU, you need special tools. These tools help you write, fix, and upload code to the microcontroller. Picking the right tools makes your work easier and faster.
For beginners, Atmel Studio is a good option. It works well with the ATMEGA128-16AU and is easy to use. You can write code in C or C++ and debug it easily. If you want something simpler, try Arduino IDE. It’s great for basic projects and quick coding.
Make sure your compiler supports AVR microcontrollers. The GCC (GNU Compiler Collection) is a popular choice. It changes your code into a language the microcontroller understands.
Tip: Use Atmel Studio for advanced projects. For simple tasks, Arduino IDE is better.
Writing and Sending Code for Data Collection
After choosing your tools, start writing your code. First, decide what your project will do. For example, if you’re tracking temperature, plan how often to read the sensor and save the data.
Here’s an example of code to read data from a sensor:
#include <avr/io.h>

void ADC_Init() {
    ADMUX = (1<<REFS0); // Set reference voltage
    ADCSRA = (1<<ADEN) | (1<<ADPS2) | (1<<ADPS1); // Enable ADC and set prescaler
}

uint16_t Read_ADC(uint8_t channel) {
    ADMUX = (ADMUX & 0xF8) | channel; // Select ADC channel
    ADCSRA |= (1<<ADSC); // Start conversion
    while (ADCSRA & (1<<ADSC)); // Wait for conversion to complete
    return ADC;
}

int main() {
    ADC_Init();
    uint16_t sensorData;
    while (1) {
        sensorData = Read_ADC(0); // Read data from channel 0
        // Process or store the data
    }
}
Once your code is ready, connect the programmer to the ATMEGA128-16AU. Use the ISP pins for this step. In Atmel Studio, compile and upload your code. The software will guide you through the process.
Note: Test your code on a breadboard before using it in real life.
Techniques for Real-Time Data Handling
Real-time tasks are important for many projects. The ATMEGA128-16AU is great at handling these tasks. To make it work well, you need to optimize your code and use its features wisely.
Interrupts: Use interrupts for time-sensitive tasks. For example, set a timer to read sensor data regularly. This keeps data collection steady.
Buffers: Add buffers to store data temporarily. This avoids losing data when handling multiple inputs.
Simple Code: Write simple and fast code. Avoid heavy calculations that slow things down.
Built-In Features: Use built-in tools like ADC and UART. These handle specific jobs, freeing up the CPU.
For instance, if you’re making a temperature monitor, use an interrupt to check the sensor every second. Then, use UART to send the data to a computer or screen.
Pro Tip: Test your project in different situations to ensure it works well.
By following these steps, you can create reliable projects that handle real-time tasks smoothly.
Interfacing the ATMEGA128-16AU with Sensors and Actuators
Common Interfaces (e.g., ADC, UART, SPI, I2C)
The ATMEGA128-16AU has many ways to connect to sensors. These connections help gather data and control devices easily. Each type of connection is useful for specific tasks.
Analog-to-Digital Converter (ADC):
This microcontroller has 8 ADC channels. It changes signals from analog sensors into digital data. For instance, it can read temperature or pressure from sensors.UART (Universal Asynchronous Receiver-Transmitter):
UART allows the microcontroller to talk to other devices. It’s great for sending data to a computer or getting commands.SPI (Serial Peripheral Interface):
SPI is a fast way to connect to devices like memory chips. It works well with digital sensors too.I2C (Inter-Integrated Circuit):
I2C uses only two wires to connect multiple devices. Sensors and actuators can share these wires to talk to the microcontroller.
With 53 I/O pins, the ATMEGA128-16AU can handle many tasks. Its 16MHz clock speed ensures quick and smooth data transfer.
Practical Examples of Sensor Integration
Connecting sensors to the ATMEGA128-16AU is simple. Here are some examples:
Temperature Monitoring:
Attach a temperature sensor like LM35 to an ADC pin. The microcontroller reads the signal, converts it, and shows the temperature.Motion Detection:
Use a PIR sensor with a digital pin. The microcontroller senses motion and activates a buzzer or light.Pressure Measurement:
Connect a pressure sensor to an ADC pin. The microcontroller reads the signal, processes it, and sends the data using UART.I2C-Based Sensors:
Link an I2C sensor, like an accelerometer, to the microcontroller. It reads the data and uses it for tasks like tracking vibrations.
The table below highlights features that help with sensor and actuator connections:
Feature | Description |
|---|---|
Architecture | 8-bit AVR architecture |
Clock Speed | 16MHz |
Flash Memory | 128KB |
I/O Pins | 53 I/O pins |
Communication Interfaces | I2C, SPI, USART |
Operating Temperature Range | -40°C to +85°C |
Applications | Industrial automation, smart home hubs, portable medical devices, automotive control units |
Using these features, you can build dependable systems for automation or real-time tasks.
Data Collection and Control in Factory Automation
Logging and Storing Data in Real-Time
Recording data in real-time is important for factory automation. It helps track and save sensor information all the time. This way, you can spot problems and study patterns quickly. The ATMEGA128-16AU microcontroller makes this easy with its ADC and communication tools. These features help gather and send sensor data to storage devices.
To log data in real-time, connect sensors to the microcontroller. Use ADC for analog sensors or digital pins for digital ones. Then, program it to read data regularly. For instance, set a timer to collect data every second. After collecting, send the data to an SD card or computer using UART or SPI.
Tip: Add a buffer to hold data briefly before sending it. This avoids losing data during fast operations.
Real-time logging ensures accurate data collection. It helps improve automation systems and make better decisions.
Using Feedback Loops for Control
Feedback loops are key for precise control in automation. They adjust machines based on live sensor data. The ATMEGA128-16AU is great for this because it processes fast and has many I/O pins.
To make a feedback loop, connect sensors to the microcontroller. For example, use a temperature sensor to check a heater. Program it to compare the sensor's data with a target value. If the data is off, the microcontroller signals actuators to fix it. This keeps the system working as needed.
A common method is the PID controller. It uses math to adjust actuator actions based on sensor data. The ATMEGA128-16AU's 16MHz speed handles these calculations smoothly.
Pro Tip: Test your feedback loop in different situations to ensure it works well.
Using feedback loops improves control and reduces mistakes in automation systems. This boosts performance and accuracy.
Best Practices for Reliable Performance
Keeping the Microcontroller Reliable in Tough Conditions
Factories can be tough places with heat, dust, and shaking. These can harm equipment. To keep the ATMEGA128-16AU working well, follow these tips:
Protect the Microcontroller: Cover it to block dust and water. Use strong materials that handle heat and don’t rust.
Stable Power Supply: Give it steady power between 4.5V and 5.5V. Add capacitors to stop sudden voltage changes.
Secure Connections: Check wires and plugs often. Loose ones can stop data collection or control.
Manage Heat: Use fans or heat sinks if it gets too hot.
Tip: Test your setup in real factory conditions to find problems early.
These steps help the microcontroller stay reliable even in hard environments.
Fixing Problems and Debugging
Fixing problems keeps your system running smoothly. When something goes wrong, follow these steps to find and fix it:
Check Power Supply: Make sure the voltage is steady. Bad power can cause strange issues.
Inspect Connections: Look for loose or broken wires. Fix or replace them if needed.
Test Code: Use a simulator or debugger to check your program. Look for mistakes in the code.
Watch Sensor Data: Use tools like an oscilloscope to check sensor signals. Ensure they are correct.
Use Diagnostics: Check the microcontroller’s status registers to find internal problems.
Pro Tip: Write down errors and fixes. This helps you solve repeated problems faster.
By solving issues step by step, you can reduce downtime and keep things running smoothly.
Using the ATMEGA128-16AU for real-time data collection needs a few steps. First, set up the hardware and connect the pins. Then, program the microcontroller to work with sensors and devices. Make sure everything is connected for smooth data flow. Lastly, adjust the system to work well in tough factory conditions.
This microcontroller helps factories by being fast, reliable, and flexible. It can quickly process data and handle many tasks at once. This makes it a great choice for automation projects.
Try using the ATMEGA128-16AU to improve your automation systems. Its flexibility can help you control machines and manage data better.
FAQ
Why is the ATMEGA128-16AU good for real-time data collection?
The ATMEGA128-16AU works fast with its 16MHz clock speed. Its 8-channel ADC collects accurate sensor data. It also connects devices easily using UART, SPI, or I2C.
Can beginners program the ATMEGA128-16AU?
Yes, beginners can program it. Arduino IDE makes it simple to start. Begin with easy projects like reading sensor data. Use tutorials and example codes to learn step by step.
How can you keep the ATMEGA128-16AU reliable in factories?
Keep dust and heat away from the microcontroller. Use steady power and check all connections. Test your setup in real conditions to find and fix problems early.
What sensors work well with the ATMEGA128-16AU?
The ATMEGA128-16AU supports both analog and digital sensors. Popular ones include LM35 for temperature, PIR for motion, and pressure sensors. I2C sensors like accelerometers also work well.
How do you fix problems during setup?
First, check the power supply and connections. Use a multimeter or oscilloscope to check signals. Debug your code with Atmel Studio. Look at the microcontroller’s status registers for errors.
Tip: Write down problems and fixes to save time later.
See Also
Utilizing ATmega328P-AU for Your DIY Electronic Projects
Discover High-Speed Data Acquisition with AD9231BCPZ-40
Enhancing Automation Using PIC16F1824-i/SL Microchip Technology
Investigating TMS320F28335PGFA for Real-Time Control Solutions